


If you're setting up Windows 11 this year, you'll probably want to clean it up right away. A fresh install can feel cluttered, and Microsoft's aggressive push for its services only adds to the frustration.
Windows 11 has earned a reputation for unnecessary bloat, and while it introduces new features, it also brings more annoyances. Even a clean installation comes with unwanted apps and settings that make the experience frustrating before you even factor in extra software from your PC manufacturer.
We’ve always wished Microsoft would offer a cleaner version of Windows—like the Enterprise edition—with fewer pre-installed apps and less pressure to use Microsoft services. But since most of us are stuck with the Home and Pro versions, which behave the same despite their price difference, we've put together this updated guide to help you declutter Windows 11 24H2.
This isn’t about creating a completely stripped-down version of Windows or disabling every form of data collection. We’re sticking to official settings and features that Microsoft allows you to disable or remove. There are more extreme methods, like NTDev’s Tiny11 project, but modifying Windows at that level can lead to compatibility and security issues, especially when it comes to installing updates.
Avoiding a Microsoft Account Sign-In During Setup
One of the biggest complaints about Windows 11 is that it forces you to sign in with a Microsoft account. Unlike older versions, there’s no obvious way to create a local account during setup—this applies to both Home and Pro editions as of Windows 11 22H2.
There are two main reasons you might want to avoid signing in:
You simply don’t want a Microsoft account. Signing in means more upsells for Microsoft 365, OneDrive, and Game Pass, since the system assumes you’re ready to subscribe.
You use a Microsoft account but prefer to sign in later. This can help you avoid unnecessary prompts and ensures your user folder is named properly (e.g.,
C:\Users\YourNameinstead ofC:\Users\randomstring).
If you’d rather skip the sign-in process, here’s how:
Using the Command Line
During setup, after selecting your language and keyboard layout, but before connecting to the internet, press
Shift + F10(you may need to pressFnas well on some keyboards) to open the command prompt.Type
OOBE\BYPASSNROand pressEnter. Your PC will reboot.When setup restarts, click "I don't have Internet" on the network screen.
You’ll now see the option for "Limited setup," which allows you to create a local account like in older versions of Windows.
For Windows 11 Pro Users
If you have Windows 11 Pro, there’s another way to bypass the Microsoft account requirement without using the command line:
Proceed through setup as usual, including connecting to the internet and checking for updates.
When asked if you're setting up the PC for "personal use" or "work or school," select "work or school."
Click "Sign-in options," then select "Join a domain."
You’ll now be able to create a local account instead of signing in with a Microsoft account.
While this method technically involves "tricking" Windows, it’s a harmless workaround. Considering how much Windows 11 pushes AI features and subscriptions, a little misdirection seems fair game.
Using the Rufus Tool
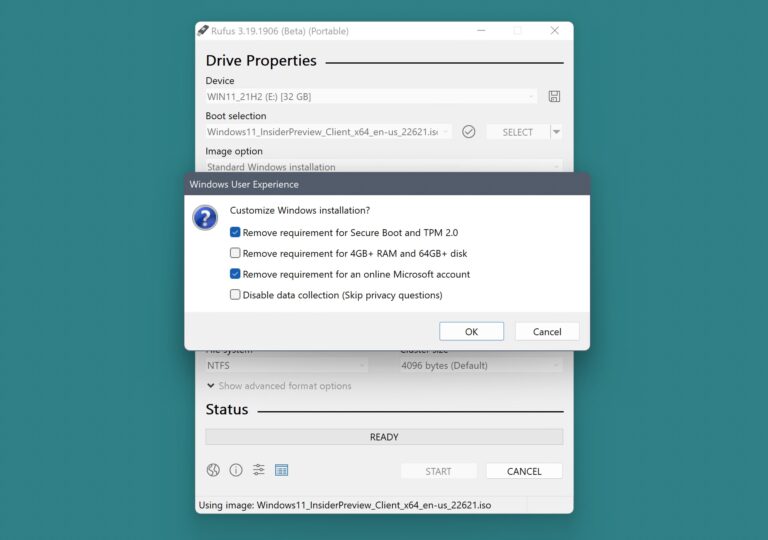
Rufus is a well-known open-source tool for creating bootable USB drives for Windows and Linux. If you frequently install Windows 11 and want to bypass some of Microsoft’s restrictions, Rufus can help. It allows you to tweak installation media so that local account options always appear, regardless of the Windows edition.
To get started, download Rufus and a fresh Windows 11 ISO from Microsoft. You'll also need a USB drive—preferably 16GB or larger with USB 3.0 support for faster performance. A dual USB-C/USB-A drive can also be handy for broader compatibility.
Open Rufus and select your USB drive and the Windows ISO.
Click "Start" to begin the process.
Rufus will prompt you to disable system requirement checks, remove the Microsoft account requirement, and turn off data collection settings.
Choose the options that best fit your needs. For example, disabling Secure Boot and TPM checks won’t prevent those features from working after installation.
Completing Windows 11 Setup
Once the installation starts, avoid unnecessary Microsoft 365 or Game Pass offers. On the privacy settings screen, toggle all options to "No" to limit data collection. These include:
Location services
Find My Device
Various telemetry and browsing data options
If you need to adjust these later, you can find them in Settings > Privacy & Security.
Cleaning Up Windows 11
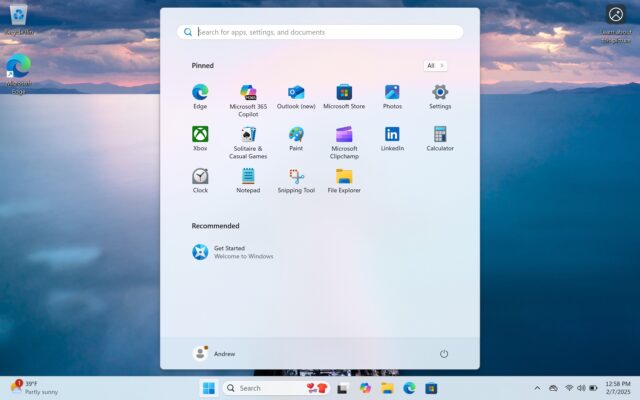
After setup, your Windows 11 desktop may include pre-installed apps and third-party shortcuts like Spotify or Grammarly. These often download automatically once you connect to the internet.
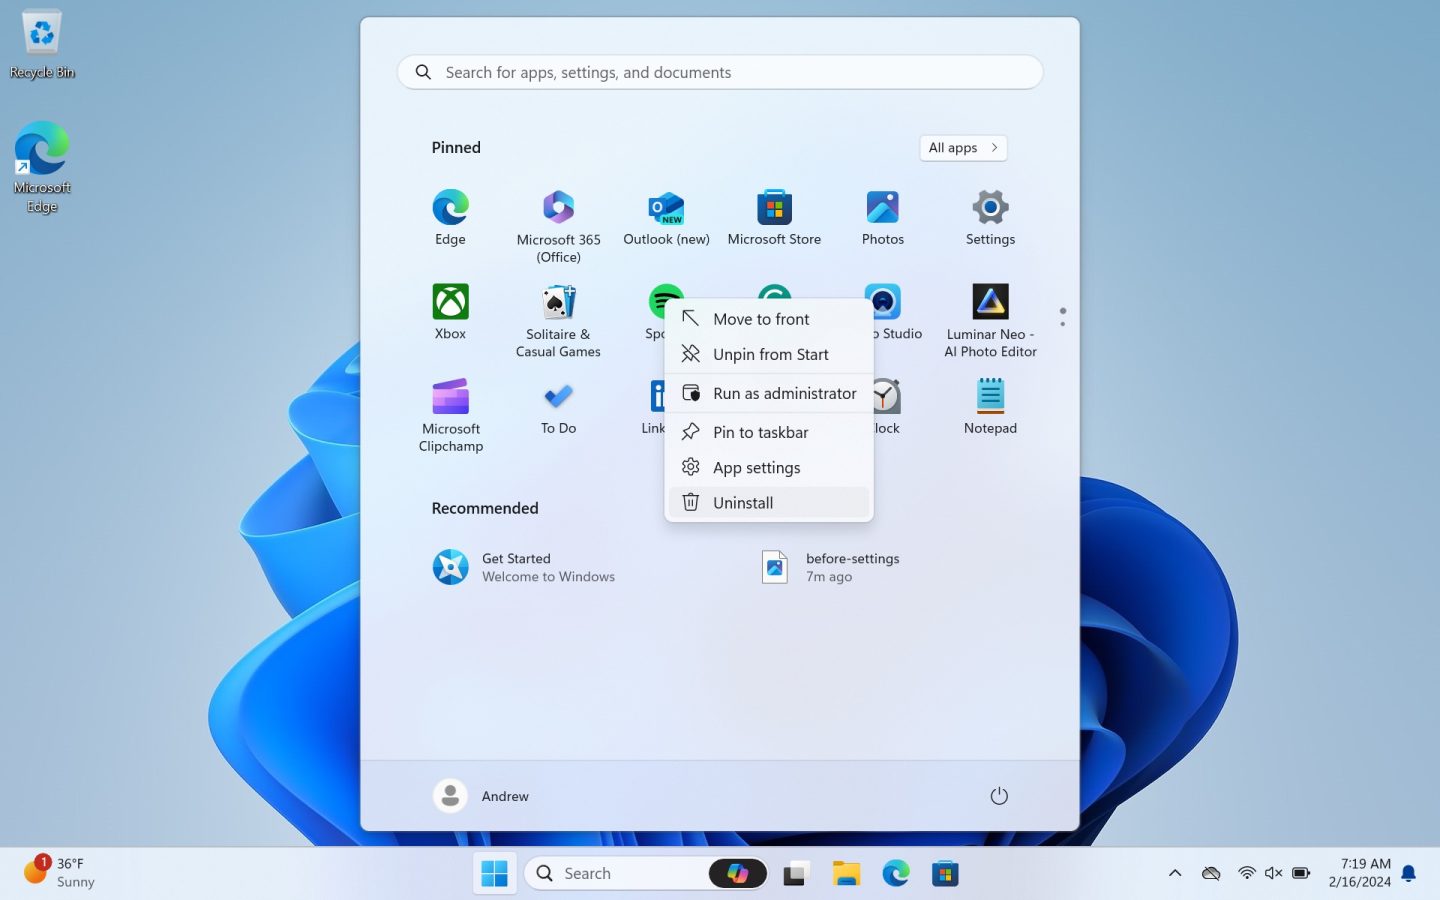
To remove them:
Open the Start menu and right-click unwanted app icons.
Select "Uninstall" to remove them completely.
Some of these apps are placeholders that won’t fully install until launched, so removing them early ensures they don’t take up space.
Removing Pre-Installed Apps
Windows 11 includes various built-in apps, some useful and some unnecessary. Here’s a list of apps you can remove via Settings > Installed Apps:
Calculator
Camera
Copilot
Family
Feedback Hub
Mail and Calendar
Maps
Media Player
Microsoft 365 Copilot
Microsoft Clipchamp
Microsoft OneDrive
Microsoft Teams
Microsoft To Do
News
Notepad
Outlook (new)
Paint
Photos
Power Automate
Quick Assist
Remote Desktop Connection
Snipping Tool
Solitaire & Casual Games
Sound Recorder
Sticky Notes
Terminal
Weather
Web Media Extensions
Web Search from Microsoft Bing
Windows Clock
Xbox
Xbox Live
Since Windows 11 23H2, most core system apps are now under the "System Components" section and cannot be removed. However, Edge and its related components remain non-removable yet aren’t categorized as system components.
Remapping the Copilot Key
If your device has a dedicated Copilot key and you removed Copilot, you can remap the key in Settings > Personalization > Text Input. Unfortunately, Windows currently only allows reassignment to Search or Microsoft 365, not custom apps.
Phase 3: Start, Search, Taskbar, and Lock Screen Decluttering
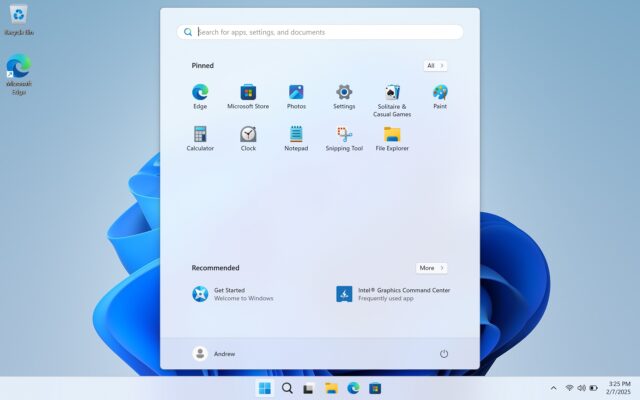
Microsoft has been on a yearslong effort to optimize space usage in the Start menu and taskbar, often adding elements that may not be necessary for all users. Fortunately, many of these elements can be turned off.
Removing Windows Spotlight and Cleaning Up the Desktop
A fresh install of Windows 11 24H2 uses Windows Spotlight wallpapers by default, which are automatically downloaded from the Internet. While visually appealing, they also come with a "learn more about this picture" desktop icon. To remove this:
- Right-click an empty space on the desktop.
- Click Personalize.
- Select any of the built-in Windows themes to disable Spotlight and remove the icon.
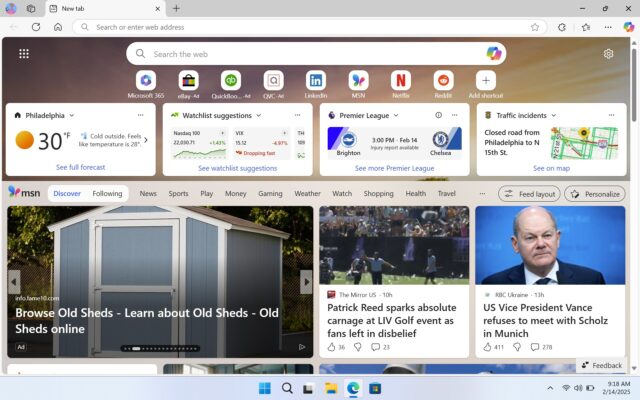
Taskbar Customization
- Right-click the Taskbar and select Taskbar settings.
- Disable the Widgets board to remove the weather icon and news articles.
- If you want to keep Widgets but clean them up:
- Open the Widgets menu.
- Click the Settings gear in the top-right corner.
- Scroll to Show or hide feeds and disable suggested feeds.
- If you want to keep Widgets but clean them up:
- In Taskbar settings, change the Search field to "search icon only" to minimize space usage.
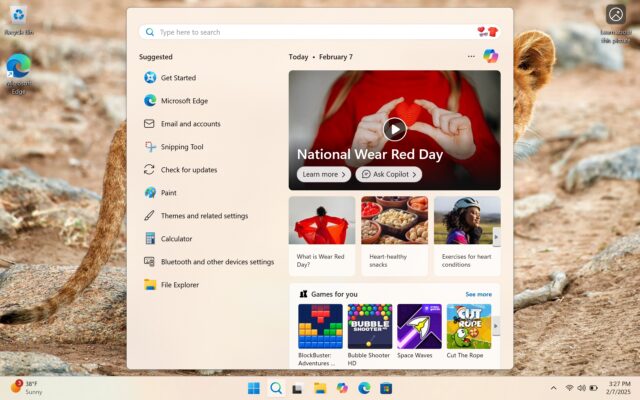
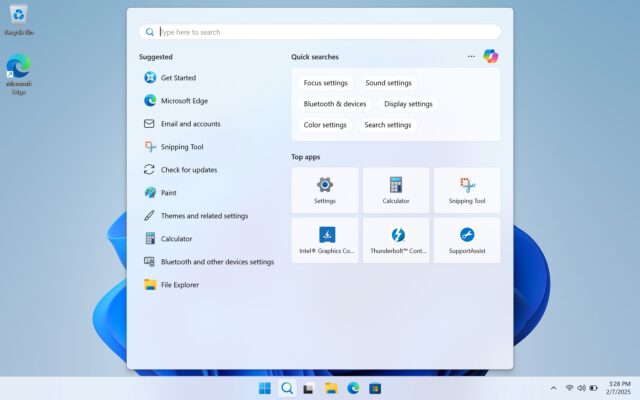
Optimizing Windows Search
By default, Windows Search includes unnecessary graphics and third-party suggestions. To simplify it:
- Open Settings > Privacy & Security > Search permissions.
- Under More settings, disable Show search highlights.
Disabling Notifications and Suggestions
- Open Settings > Privacy & Security > General and disable:
- Show me suggested content in the Settings app.
- Show me notifications in the Settings app.
- Open Settings > Personalization > Start and disable:
- Show recommendations for tips, shortcuts, new apps, and more.
- Show account-related notifications to reduce Microsoft account prompts.
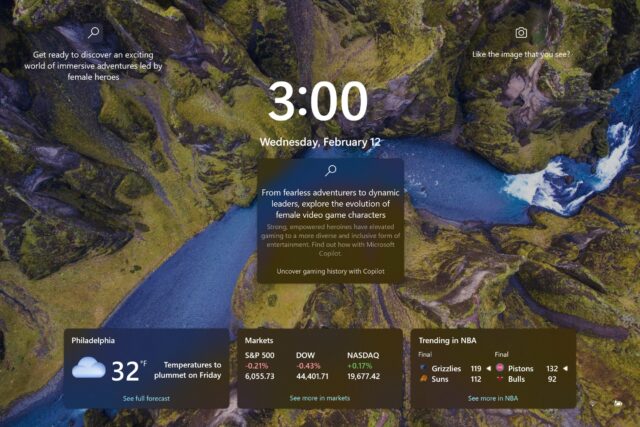
Lock Screen Cleanup
- Navigate to Settings > Personalization > Lock screen.
- Under Lock screen status, select none to remove unnecessary widgets.
- Change Personalize your lock screen from Windows spotlight to Picture or Slideshow to disable additional elements.
- Uncheck Get fun facts, tips, tricks, and more to eliminate extra text boxes.

Reducing Windows 11 Notifications and Upsells
To minimize intrusive messages:
- Open Settings > Privacy & Security > General and turn off all toggles.
- Go to Diagnostics & Feedback and set Feedback frequency to Never.
- In Settings > System > Notifications:
- Disable Suggested notifications.
- Scroll down and uncheck all three additional settings at the bottom to stop "Finish setting up your PC" prompts.
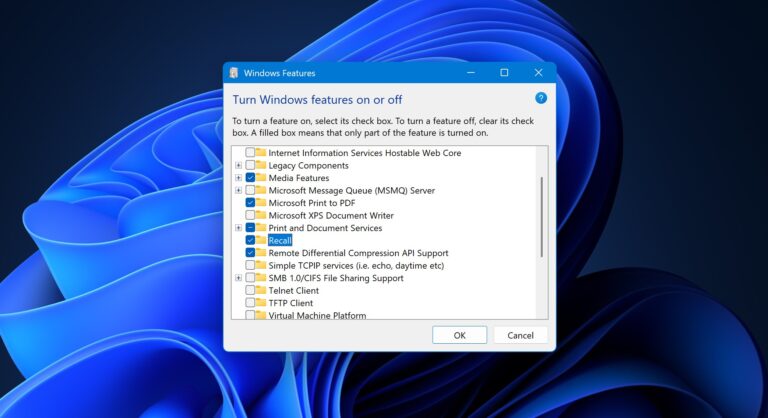
Managing Copilot+ PCs and Recall
New Windows 11 Copilot+ PCs come with additional AI-driven features, including Recall. If you want to remove it:
- Open Settings > System > Optional Features.
- Scroll to the bottom and click More Windows features.
- Uncheck Recall in the "Turn Windows features on or off" menu.
Cleaning Up Microsoft Edge
Microsoft Edge, despite its speed and compatibility, comes with numerous built-in features that can clutter the experience. Here’s how to streamline it:

Disabling Extra Features
- Right-click and hide the Browser essentials button.
- Open the Start page, click the Settings gear, and:
- Turn off Quick links (or disable sponsored links if you keep them).
- Disable Show content.
- Click Your privacy choices at the bottom and opt out of personalized ads.
Adjusting Settings
- Open Edge settings via the ellipsis menu (⋮) > Settings.
- Under Profiles, disable Microsoft Rewards.
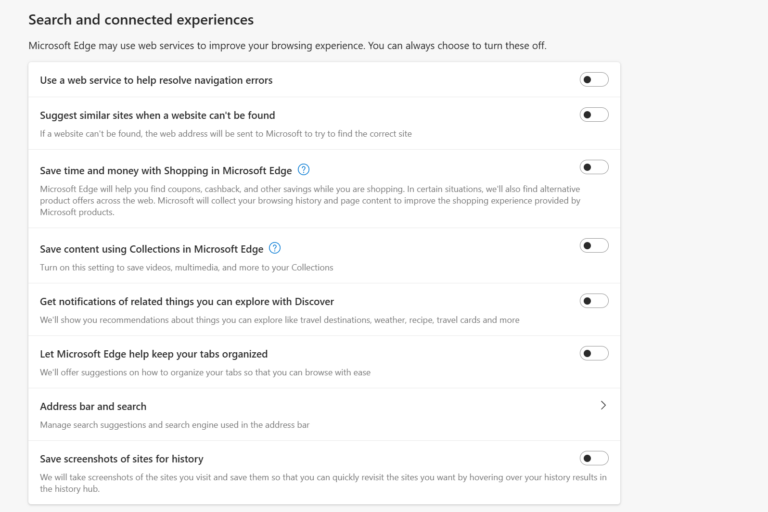
- Navigate to Privacy, Search & Services and:
- Set Tracking prevention to Strict.
- Disable all toggles under Optional diagnostic data, Search and service improvement, and Personalization & advertising.
- Disable all Services toggles to prevent unwanted pop-ups.
- Change Address bar and search to use your preferred search engine and disable search suggestions.
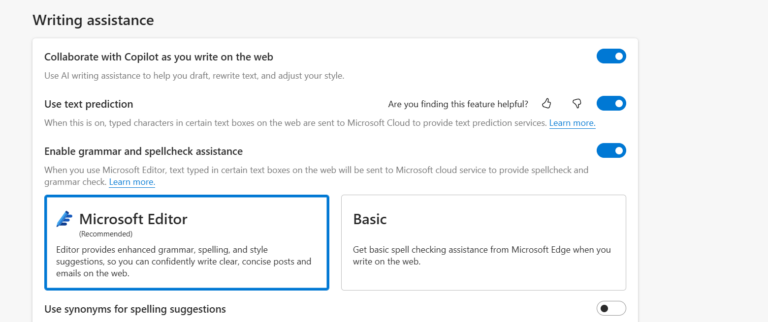
Turning Off Copilot Features
- Open Settings > Sidebar > Copilot.
- Disable Show Copilot button on the toolbar.
- Under Languages, disable Collaborate with Copilot as you write and Use text prediction.
By applying these changes, you can significantly reduce the amount of unnecessary clutter, notifications, and advertisements in Windows 11 and Microsoft Edge, making for a cleaner and more streamlined experience.
Windows-as-a-Nuisance
The most time-consuming part of installing a fresh, direct-from-Microsoft copy of Windows XP or Windows 7 was usually reinstalling all the apps you wanted to run on your PC, from your preferred browser to Office, Adobe Reader, Photoshop, and the VLC player. You still need to do all of that in a new Windows 11 installation. But now, more than ever, most people will want to go through the OS and turn off a bunch of stuff to make the day-to-day experience of using the operating system less annoying.
In case you haven't heard, Microsoft has declared 2025 to be "the year of the Windows 11 PC upgrade." The company is, not coincidentally, shutting off security updates for most Windows 10 users in October. If you've been avoiding Windows 11 so far, 2025 is the year you'll probably need to start using it if you have apps, games, or workflows that rely on Windows.
The settings changes we've recommended here may not fix everything, but they can at least give you some peace, shoving Microsoft into the background and allowing you to do what you want with your PC without as much hassle. Ideally, Microsoft would insist on respectful, user-friendly defaults itself. But until that happens, these changes are the best you can do.


Steven Mugalu
1 ano atrás